How to Build a DIY Home Sauna: Your Complete Owner’s Manual
Disclosure : This post may contain affiliate links or paid partnerships. I may earn compensation if you click a link or make a purchase, at no additional cost to you. See my disclosure for more info.
You already know what a sauna feels like. That’s the problem.
You’ve sat in one at a gym, a hotel, a friend’s house. And somewhere in that heat, with that wood smell and that silence, you thought: I want this at home. Now you’re here. Which means you’re actually going to do it this time.
The internet will try to overwhelm you with conflicting specifications and brand wars and nightmare stories. Ignore it. This guide gives you the manual — every phase, in order, with nothing left out. Let’s build your sauna.
What’s Actually Standing Between You and Your Own Sauna
It’s not the construction. Most of this project is well within the reach of anyone who’s completed a basic home improvement job. What actually stops people is the ordering problem. They’re shopping for sauna backrest designs and browsing accessory bundles before they’ve answered the questions that determine what the build actually looks like. Answer decisions in sequence. The confusion dissolves. The project becomes clear.
1. Where Your Sauna Lives — And Why Location Shapes Everything
This is your first real decision. Everything — materials, wiring, drainage, ventilation — branches from it. Excellent locations include: a basement room or spare bathroom with existing plumbing, a sectioned portion of a garage, a dedicated shed or outbuilding, or a large closet converted to hold a compact one-person infrared unit.
Hard requirements: a floor drain within reach, accessible electrical service, and flooring that doesn’t absorb moisture. Concrete, tile, and quality vinyl all pass. Carpet does not survive this environment. Factor in the cool-down moment too — after a proper session you want a clear path to a cold shower or fresh air. That transition is part of the ritual. Design for it. Ceiling height: 7 feet is the practical ceiling. Heat stratifies upward and extra height above that point wastes energy and dilutes the experience you’re working toward.
2. Traditional Finnish Steam or Infrared — Understanding Both Before You Choose
This is the decision that shapes your entire build. Make it deliberately. Traditional Finnish sauna: A stone heater generates high, radiating heat. Water on the stones produces löyly — the rolling wave of steam that defines the Finnish experience. Temperatures run from 150°F to 195°F. This is the real thing.
Infrared sauna: Radiant panels heat your skin and muscles directly, not the air around them. Temperatures hover between 120°F and 150°F. Energy-efficient. Much simpler to install. A well-designed 2-person infrared cedar cabin runs off a standard household outlet. Your choice here determines your lumber list, your electrical plan, your insulation approach, and your ventilation design. Everything connects back to this one question. If you’re chasing the classic steam experience, traditional is the only honest answer. If you want something quieter on the infrastructure and gentler on the body, infrared is a genuinely excellent choice — not a compromise.
3. The Right Footprint — How Much Space Do You Actually Need?
The temptation is to go bigger. Resist it. Oversized saunas underperform. A room that’s too large takes forever to heat, strains the heater, and runs up energy costs without making the session more enjoyable. Compact and efficient is the target.
Practical size guide: One person: 3’ x 3’ for infrared, 4’ x 4’ for traditional — a purpose-built 2-person steam sauna scales to this range easily. Two people: 4’ x 6’, comfortable for side-by-side sessions. Four users: 5’ x 7’ — generous but not wasteful. A 4-person cedar indoor sauna is built exactly for this footprint. Every heater manufacturer publishes cubic footage capacity ratings. Pull yours. Do the math. Never guess.
4. Choosing the Wood That Will Define Your Sauna’s Character
This is where the project starts to feel like yours. Western red cedar earns its reputation. Naturally moisture-resistant, dimensionally stable under thermal cycling, beautiful to look at, and remarkable against bare skin even at high temperatures. It’s the gold standard for a reason.
Worthy alternatives: Hemlock — clean, pale, nearly odorless, and less expensive than cedar, available as light tongue-and-groove boards; Basswood — the top recommendation for users with fragrance sensitivities; Nordic spruce — the wood in most Scandinavian saunas. Absolute avoidances: Pine (sap bleeds at sauna heat), oak (becomes painful to touch), and any pressure-treated wood (chemicals used in treatment are toxic when heated — not a minor concern). Install tongue-and-groove paneling horizontally, ¾” to 1” thick. Round all bench edges before installation.
5. Framing and Insulation — Build It Right or Pay for It Later
This is the phase nobody photographs. It’s also the phase that determines whether your sauna performs for decades or disappoints you within months. Frame it: Standard 2×4 studs, 16 inches on center. No special approach required. Insulate properly: R-13 fiberglass batt in the walls. R-22 minimum in the ceiling — this surface matters most because heat rises and escapes upward fastest.
Install the vapor barrier without shortcuts: An aluminum foil vapor barrier on the interior side of the insulation is not optional. It reflects radiant heat back into the room and seals the wall assembly against moisture infiltration. Plastic sheeting does not substitute. Housewrap does not substitute. Only aluminum foil rated for high-heat applications. Overlap seams by at least 6 inches and tape meticulously with foil tape. One uncovered gap becomes a pathway for moisture that silently rots your framing from the inside.
6. Ventilation Strategy — Let the Heat Work With You, Not Against You
A sealed sauna is a dangerous sauna. This step is non-negotiable. Two openings, correctly positioned, create the airflow your sauna needs: a low intake vent near the heater base (roughly 6 inches off the floor) and a high exhaust vent near the ceiling on the opposite wall, fitted with an adjustable damper to control airflow.
The physics are simple: cool incoming air heats as it rises, pushing spent air out through the upper vent in a continuous cycle. Each opening is only 4” x 6”. The impact on your health and on the longevity of the wood is far larger than those dimensions suggest. Without adequate airflow, CO₂ levels rise, sessions become hazardous, and the wood never fully dries between uses — which is how mold takes hold inside a sealed sauna structure.
7. Selecting a Heater — The Beating Heart of Your Sauna
Every board you’ve cut, every panel you’ve installed, every decision you’ve made points to this unit. Choose it carefully. For traditional builds: An electric heater with integrated panel controls is the standard for indoor installations. Match kilowattage to room cubic footage precisely using the manufacturer’s specifications.
Traditional heaters demand a dedicated 240V circuit with typically 30 to 60 amps of capacity. A model like the Harvia 6kW KIP gives you a useful baseline for discussing load requirements with an electrician. A licensed electrician is required here. Non-negotiable. High-voltage wiring errors cause fires. For infrared builds: Most operate on standard 120V circuits. A high-quality 2-person far infrared sauna plugs in like a large appliance. For a first-time builder, this simplicity is a real advantage.
8. Door Design and Safety — What the Specs Really Mean
The door is simple — until you understand what’s at stake. Then it becomes very important. Solid construction. Outward swing only. These two requirements exist because of emergency access: if a user loses consciousness from heat, an outward-opening door remains accessible even if the person is on the floor against it.
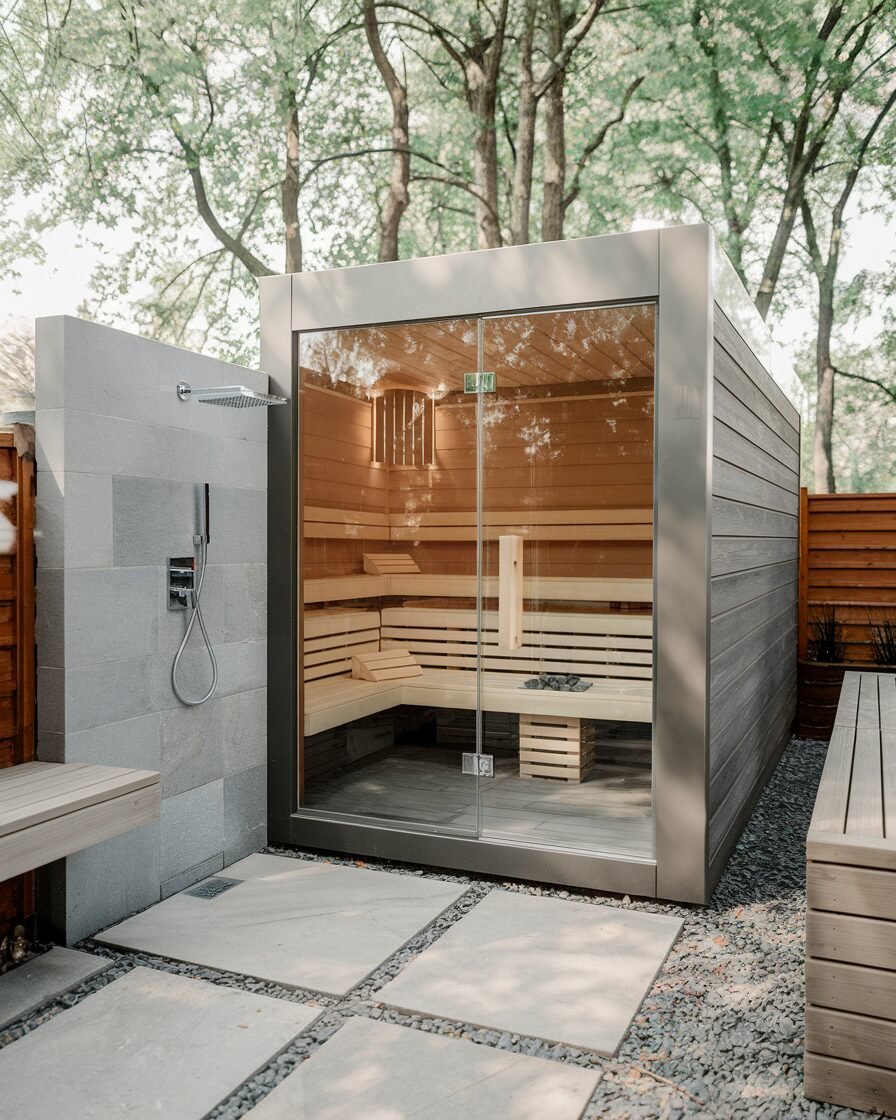
Tempered glass panel doors are a popular choice — they keep the space feeling open and allow light inside. Wood doors with inset glass work equally well. For hardware: magnetic catch or spring latch only. No lock of any kind. A locking mechanism inside a room that can reach 190°F is an unacceptable risk.
9. Sauna Lighting — Mood, Safety, and the Right Fixtures
This is where a lot of first-time builders make an expensive mistake: installing standard residential fixtures in a sauna environment. Ordinary fixtures cannot handle sustained sauna temperatures and humidity. They will fail, and the failure can be hazardous. Install vapor-proof fixtures rated for heat exposure. Heat-tolerant LED strip lighting also works beautifully and produces the warm, diffused glow that makes a sauna feel like a sauna rather than a utility room.
Mount all fixtures below the sight line or behind benches. Bright overhead light kills the atmosphere of a space designed for rest and unwinding. A compatible dimmer switch extends the range of the room from invigorating to deeply relaxing. One of the highest-impact small upgrades available.
10. Final Details That Separate a Good Sauna from a Great One
The structure is complete. These finishing elements are what make you never want to leave. Bench configuration: L-shaped layouts make excellent use of corner space. The upper bench sits at maximum heat intensity; the lower offers a milder experience or serves as a footrest. A quality solid cedar bench is the soul of the room — invest accordingly. Backrest: Angle-cut a simple rest from your bench wood. Or save the effort with a ready-made wooden sauna backrest that clips in without any fabrication.
Steam ritual tools: For traditional saunas, a quality wooden bucket and ladle is how you introduce water to the stones. The löyly that results is the signature of the Finnish sauna tradition. Session monitoring: A wall-mounted thermometer and hygrometer at seated eye level; a sand timer to keep your session timed the traditional way. Flooring: Hard flooring underneath with a removable slatted wood bath mat on top.
11. The Cure and the First Real Session — What to Expect
You’re almost there. But there’s one more step before you use it for real. Run the heater to around 140°F for one to two hours, opening the door a few times throughout. This is the curing process — it drives out residual construction moisture and stabilizes the wood’s natural oils and resins. Do this two to three times. The aroma during curing, especially with cedar, can be powerful. It fades after the first few uses.
After curing, fire it up to your target temperature. Pour water on the sauna stones if you built a traditional sauna, and let the steam fill the room. Take it in. This is yours. You built every bit of it.
The Best Time to Start Building Was Yesterday
This is the part where you realize you’ve been waiting for permission that was never required. Every day you put this off is a day you could have been using it. A home sauna is an investment in the version of your life where recovery and rest actually happen — not just as intentions but as daily facts.
Will it take a few weekends? Yes. Will there be learning moments? Almost certainly. Will you question, even once, whether it was worth it after you’re sitting inside on a cold evening with every muscle in your body finally, completely at rest? Not a chance. Close this guide. Open your measuring tape. You know what to do.
🔍 Focus Keyphrase: home sauna DIY
📌 SEO Title: Home Sauna DIY: Build One Yourself — Complete Guide
🔗 Slug: home-sauna-diy-build-one-yourself
📝 Meta Description: Your complete owner’s manual for a DIY home sauna. Covers every decision from location and wood to heater sizing, ventilation, and the first heat session.